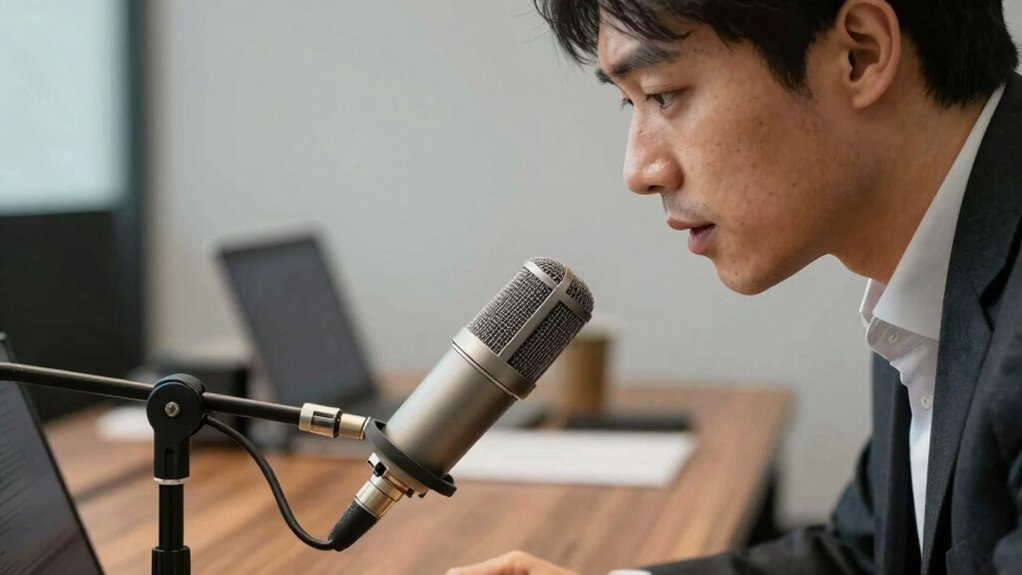

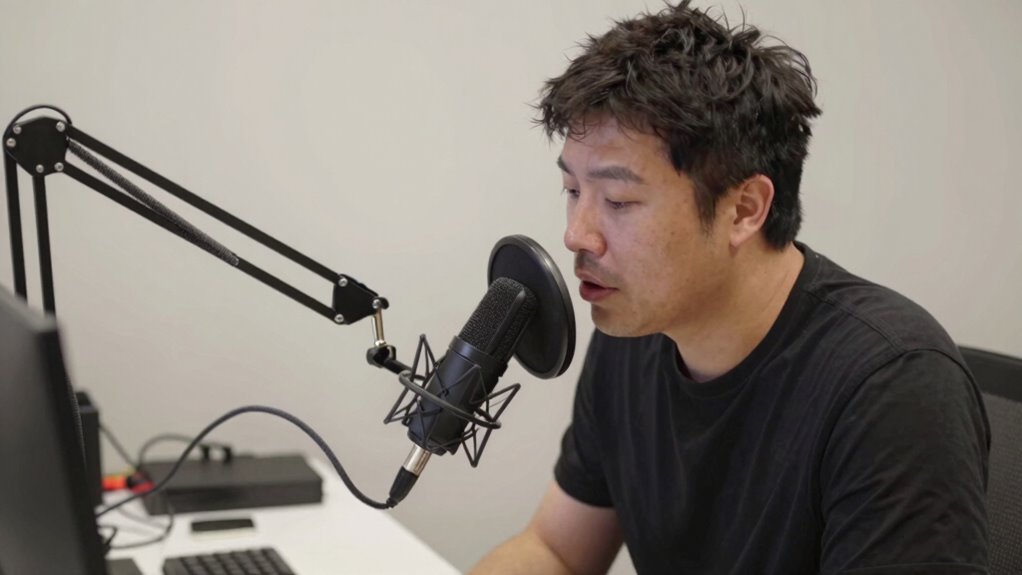
To stop leaning forward during calls, position your microphone 6-12 inches away from your mouth at eye level, keeping it slightly angled to prevent muffled sound and popping. Avoid leaning in; instead, stay relaxed and maintain consistent posture for clear, professional audio. Regularly check and adjust your setup to prevent drifting. Keep your environment quiet and use accessories like pop filters for better clarity. Stick around to learn more tips for perfecting your microphone position.
Key Takeaways
- Maintain a consistent distance of 6-12 inches from the microphone to prevent muffling and distortion.
- Position the microphone slightly above or below mouth level, angling it away from direct airflow.
- Keep your head upright and avoid leaning forward to ensure even sound capture and reduce background noise.
- Use a stable microphone stand or mount to prevent drifting from optimal placement during calls.
- Regularly check and adjust your microphone’s position to maintain proper distance and angle.
Why Proper Microphone Placement Is Key to Clear Calls
Proper microphone placement is essential because it directly affects the clarity and quality of your calls. When you position your microphone correctly, you reduce the impact of background noise that can distract or disrupt your conversation. Keeping the mic at an appropriate distance ensures that it captures your voice clearly without picking up unnecessary sounds. If the microphone sensitivity is too high, even slight background noise becomes prominent, making your voice hard to hear. Conversely, placing the mic too close can cause distortion or muffling. Finding the right placement balances capturing your voice accurately while minimizing background noise. Proper positioning allows your voice to come through crisp and clear, making your calls more professional and easier for others to understand. Additionally, using high-quality gear can further improve your call clarity by minimizing noise and distortion. Understanding audio input techniques can help you optimize your microphone setup for even better results, especially when considering microphone placement and how it influences sound capture. Being aware of exposure to environmental noise can also help you choose the best location for your microphone to enhance call quality. Regularly checking your microphone setup and making adjustments based on filtering background noise can further improve your communication experience.
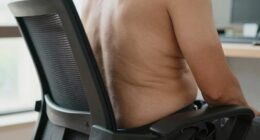
Common Problems Caused by Leaning Forward During Calls

Leaning forward during calls can cause audio clarity issues, making your voice sound muffled or distorted. This position often results in unprofessional sound quality that can distract your listeners. Addressing these problems helps guarantee your communication remains clear and polished. Additionally, maintaining proper microphone placement supports effective impact investing, ensuring your message about regenerative practices is conveyed clearly and confidently. To achieve this, it’s essential to understand regional flavors and pairings, which can influence how your message is perceived through different cultural lenses. Proper microphone placement can also prevent audio distortion, ensuring your voice remains crisp and intelligible throughout your calls. Being mindful of proper microphone positioning can significantly enhance overall sound quality and professionalism.
Audio Clarity Issues
When you lean forward during calls, it can cause significant audio clarity issues. Your microphone’s sensitivity captures more than just your voice, picking up background noise and making it harder for others to hear you clearly. Leaning in too close can also create uneven sound levels, causing your voice to sound muffled or distorted. Sudden movements or shifting position may result in inconsistent audio quality, forcing your listener to strain to understand you. Additionally, increased proximity amplifies background sounds like typing or office noise, reducing overall clarity. To maintain clear communication, keep your microphone at a consistent distance and avoid leaning forward. Proper microphone placement is essential for audio quality during calls, and understanding sound dynamics can help improve overall communication. Being mindful of microplastics in dust and other particulates in the environment can also influence ambient noise levels, further affecting sound clarity. Regularly adjusting your setup to minimize ambient interference can significantly enhance your sound quality.
Unprofessional Sound Quality
Leaning into the microphone during calls often leads to unprofessional sound quality that can undermine your credibility. When you get too close, background noise becomes more prominent, distracting your listeners. It can also cause microphone feedback, creating a harsh, echoing sound that disrupts communication. Additionally, your voice may sound distorted or overly bass-heavy, reducing clarity. You might also unintentionally pick up breathing sounds or pops from plosive words, making your speech less polished. Poor microphone placement results in inconsistent audio levels, forcing others to ask for repeats. To avoid these issues, keep a consistent distance from your mic and avoid leaning forward. Proper microphone positioning is essential for clear and professional audio during calls. Maintaining appropriate distance helps ensure your voice sounds natural and minimizes background interference.
How Correct Microphone Positioning Boosts Voice Clarity

Have you ever noticed how a slight change in microphone placement can dramatically improve voice clarity? Proper positioning guarantees your voice comes through clearly, without competing with background noise. When you place the microphone too close or too far, it affects its sensitivity, causing muffled or distorted sound. By positioning the mic at the right distance—usually about a finger’s width from your mouth—you reduce unwanted background noise and prevent your voice from sounding distant or overly sharp. Correct placement also helps avoid popping sounds and breathing noises that can distract listeners. When your microphone is positioned properly, your voice remains crisp, focused, and easy to understand, making your calls more professional and effective. Proper positioning is key to maximizing clarity and minimizing distractions.
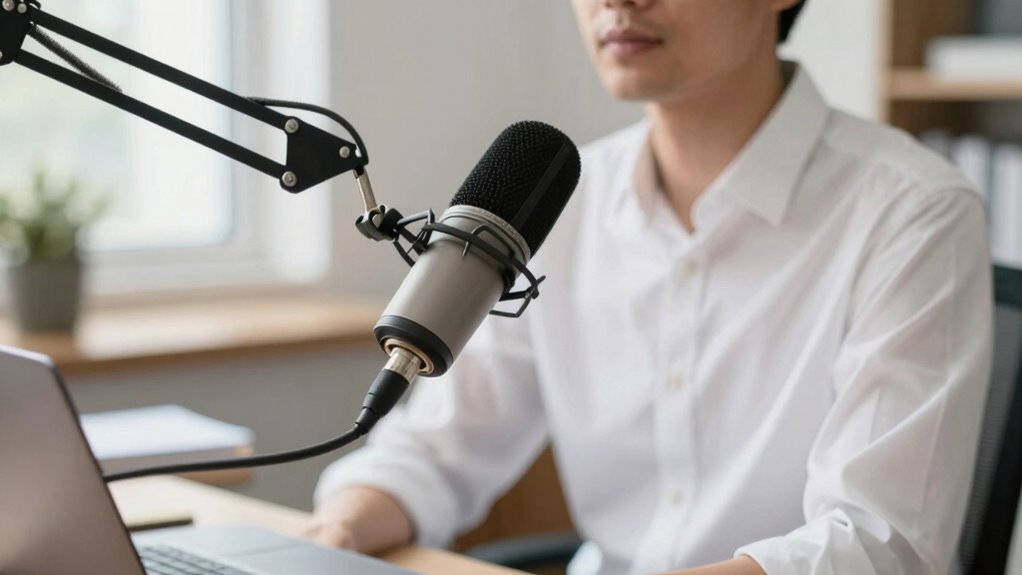
Best Tips for Microphone Placement and Distance

To get the best sound, focus on maintaining the right distance between your microphone and your mouth. Keep your mouth slightly away from the mic to prevent distortion or popping sounds. Make small adjustments until you achieve clear, balanced audio that captures your voice accurately. Additionally, using proper microphone placement techniques can significantly improve your audio quality. Proper equipment setup ensures consistent sound and minimizes background noise during your calls. Remember that consistent positioning is key to maintaining optimal audio quality throughout your conversations. Paying attention to room acoustics can also help reduce unwanted echoes and improve overall clarity. Incorporating soundproofing measures can further enhance your call quality by reducing ambient noise.
Maintain Proper Microphone Distance
Maintaining the proper distance between your microphone and the sound source is essential for capturing clear, balanced audio. When you’re too close, background noise and microphone sensitivity issues can cause distortion or muffling. Too far, and your voice may sound distant or inconsistent. To optimize your setup, keep these tips in mind:
- Avoid placing the mic too close to your mouth or other noise sources
- Stay within the recommended 6-12 inches from the microphone
- Use a pop filter to reduce unwanted noises
- Test different distances to find the clearest sound
- Minimize background noise by choosing a quiet environment
- Be aware of passive voice usage, as it can make your writing less direct and harder to follow
- Adjust your microphone placement to prevent Leaning Forward, which can lead to inconsistent audio quality.
Keep Mouth Slightly Away
Keeping your mouth slightly away from the microphone helps guarantee your voice sounds natural and clear. Proper mouth positioning ensures you’re not too close, which can cause distortion or popping sounds, or too far, resulting in muffled audio. Maintaining an ideal distance promotes consistent sound quality and reduces unwanted noise. Regularly check your distance to prevent drifting closer or farther during calls. This steady distance maintenance helps your voice stay balanced and intelligible, making communication smoother. Being aware of microphone placement techniques ensures you optimize your audio setup for the best results. Additionally, understanding cabling failures can help you troubleshoot and prevent issues that might affect your microphone’s performance. Remember, small adjustments to your mouth positioning can greatly improve your overall audio quality. Paying attention to sound environment factors can also minimize background noise and enhance clarity. Proper audio equipment setup is essential for maintaining these standards throughout your calls.
Adjust for Clear Audio
Adjusting your microphone placement and distance is crucial for capturing clear, professional-sounding audio. Proper positioning minimizes background noise and prevents microphone feedback, ensuring your voice remains crisp. Keep the mic close enough—about 6-12 inches from your mouth—to enhance clarity without causing distortion. Experiment with angles to reduce ambient noise interference. Use a pop filter or foam windscreen to block plosive sounds and reduce unwanted noise. Regularly check your audio levels to avoid clipping or muffled sound. Remember, small adjustments can make a big difference in audio quality.
- Position the mic slightly below or above your mouth for ideal sound.
- Use a shock mount to reduce vibrations and handling noise.
- Keep the microphone away from reflective surfaces.
- Adjust gain settings to balance volume and background noise.
- Test your setup before important calls or recordings.
Simple Ergonomic Tips to Stay Comfortable During Calls
To stay comfortable during calls, focus on simple ergonomic practices that support your posture and reduce strain. Maintain an ergonomic posture by keeping your back straight, shoulders relaxed, and feet flat on the floor. Adjust your chair and desk height so your monitor is at eye level, preventing neck strain. Prioritize headset comfort by choosing an adjustable model with padded ear cups and a comfortable fit.
| Tip | Benefit | Example |
|---|---|---|
| Sit with feet flat | Reduces lower back strain | Use a footrest if needed |
| Keep monitor at eye level | Prevents neck discomfort | Use monitor risers |
| Use supportive chair | Promotes good posture | Choose an ergonomic office chair |
| Opt for comfortable headset | Ensures long-term comfort | Try models with padded headbands |
Microphone Setup Mistakes to Avoid
One common mistake during microphone setup is placing the mic too close or too far from your mouth, which can lead to distorted sound or uneven volume levels. Improper microphone orientation can also cause issues, making your voice sound muffled or inconsistent. Additionally, ignoring background noise can result in distracting sounds during calls. To avoid these mistakes, keep these points in mind:
Avoid microphone placement errors by maintaining proper distance, orientation, and background noise control.
- Maintain a consistent distance from your mouth, about 6-12 inches
- Ensure the microphone is directed towards your mouth, not away
- Minimize background noise by choosing a quiet environment
- Use a pop filter or windscreen to reduce unwanted sounds
- Regularly check your microphone settings for ideal audio quality
Quick and Easy Microphone Setup for Better Sound
Setting up your microphone quickly and correctly can instantly improve your sound quality with minimal effort. Start by selecting quality audio equipment suited for your needs. Position the microphone at mouth level, about an inch away, and angle it slightly upward or downward to minimize plosives and sibilance. Use simple vocal techniques, such as speaking directly into the mic and maintaining consistent distance, to enhance clarity. Guarantee your environment is quiet and free from background noise. Adjust gain settings to avoid distortion. Practice quick checks before calls: test sound levels and make minor tweaks if needed. This straightforward setup helps you sound professional without complicated adjustments, making your calls clearer and more engaging. A little attention to detail yields noticeable improvements.
Frequently Asked Questions
How Does Microphone Placement Affect Background Noise Levels?
Your microphone placement directly impacts background noise levels by affecting sound absorption and noise cancellation. When you position the mic too far or too close, it picks up more ambient sounds, increasing background noise. Proper placement, like keeping the mic at an ideal distance, helps maximize sound absorption of your voice and improves noise cancellation, ensuring clearer calls. Avoid leaning forward, which can cause inconsistent sound pickup and more background interference.
Can Improper Positioning Cause Microphone Feedback or Echo?
Think of your microphone as a delicate tuning fork; improper placement can cause it to vibrate out of sync, leading to feedback issues and echo. When you position it too close or at the wrong angle, sound waves bounce and loop, creating echo. To prevent this, keep your mic at a proper distance and angle, ensuring clear audio and avoiding feedback problems during your calls.
What Are the Best Positions for Different Types of Microphones?
You should position microphones based on their type and sensitivity. For cardioid mics, place them about 6-12 inches away, pointing directly at your mouth, to minimize noise and feedback. Lavalier mics should be clipped close to your chest, while shotgun mics require a longer distance aimed at your voice. Use acoustic treatment to reduce echo, ensuring clear sound. Adjust placement to avoid proximity effects and optimize audio quality during calls.
How Often Should I Adjust My Microphone During Calls?
Think of your microphone as a delicate instrument that needs gentle tuning. You should adjust it as often as needed to maintain ideal sensitivity and voice clarity, usually every few minutes or when your voice or surroundings change. If you notice muffled sound or background noise, it’s time to tweak its position. Regular adjustments ensure your voice remains clear and consistent, like a well-conducted symphony that captivates your audience.
Are There Specific Ergonomic Accessories to Improve Microphone Placement?
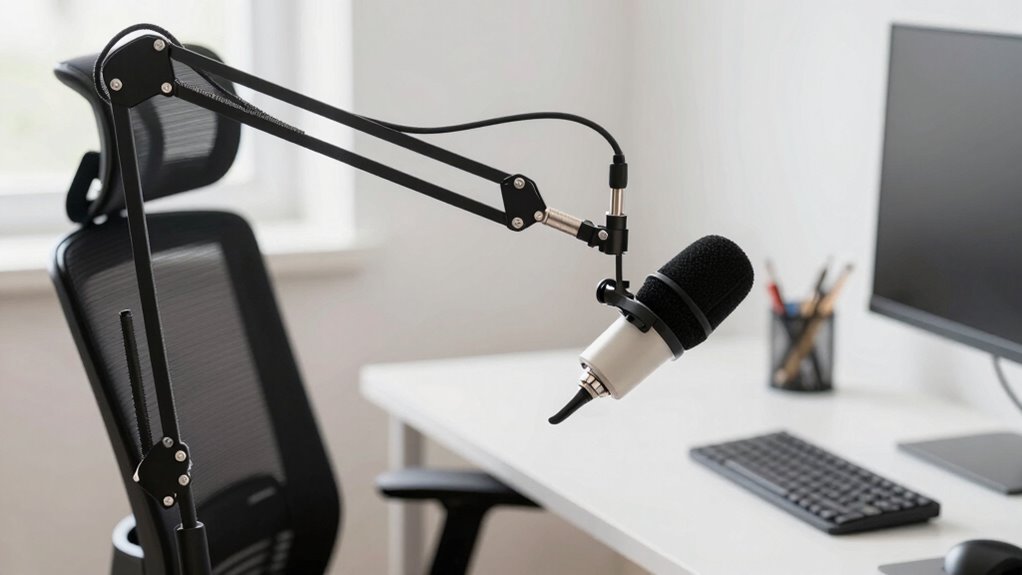
You should consider ergonomic accessories like a microphone arm and a pop filter to improve your microphone placement. A microphone arm allows you to position your mic at eye level, preventing you from leaning forward and straining your neck. A pop filter attaches to the arm, reducing unwanted noise and ensuring clear audio. These accessories make it easy to maintain good posture and stay comfortable during calls.
Conclusion
By keeping your microphone at the right distance and avoiding leaning forward, you’ll enjoy clearer calls and less strain. Good placement not only improves sound quality but also keeps you comfortable during long conversations. It’s a simple change that makes a big difference—so trust the theory that proper microphone positioning truly enhances your communication. Give it a try, and notice how much better your calls sound and feel. Your voice deserves the best setup!