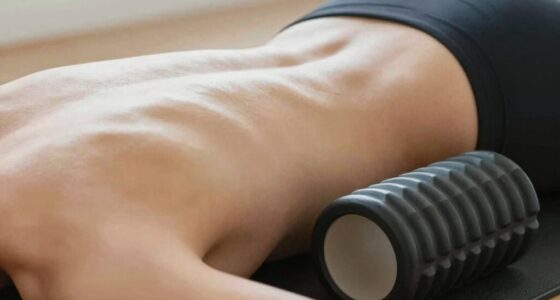

To stop sharp sensations when foam rolling your quads, adjust the angle to target muscle fibers more precisely. Keep the foam roller perpendicular to your thigh for deeper, more focused pressure, but tilt slightly if you feel discomfort, targeting tender spots gently. Use slow, controlled movements and listen to your body, changing angles to find what offers relief without pain. Continuously refining your technique will help you master effective foam rolling—if you want to learn more, keep exploring these tips.
Key Takeaways
- Adjust the foam roller to a more perpendicular or oblique angle to distribute pressure evenly and reduce sharp sensations.
- Use smaller, controlled movements to gradually increase pressure and avoid overstressing sensitive areas.
- Focus on tender spots with gentle, sustained pressure, and modify the foam angle if discomfort persists.
- Incorporate proper body positioning, such as supported or kneeling positions, to lessen direct pressure and sharp pain.
- Pay attention to body feedback; decrease pressure or change foam angle when sharp sensations occur to prevent injury.

TriggerPoint Grid 1.0 Foam Roller – 13" Multi-Density Massage Roller for Deep Tissue & Muscle Recovery – Relieves Tight, Sore Muscles & Kinks, Improves Mobility & Circulation – Targets Key Body Parts
IMPROVE MUSCLE RECOVERY – Multi-density GRID features a three-dimensional surface that provides more efficient muscle recovery by promoting…
As an affiliate, we earn on qualifying purchases.
As an affiliate, we earn on qualifying purchases.
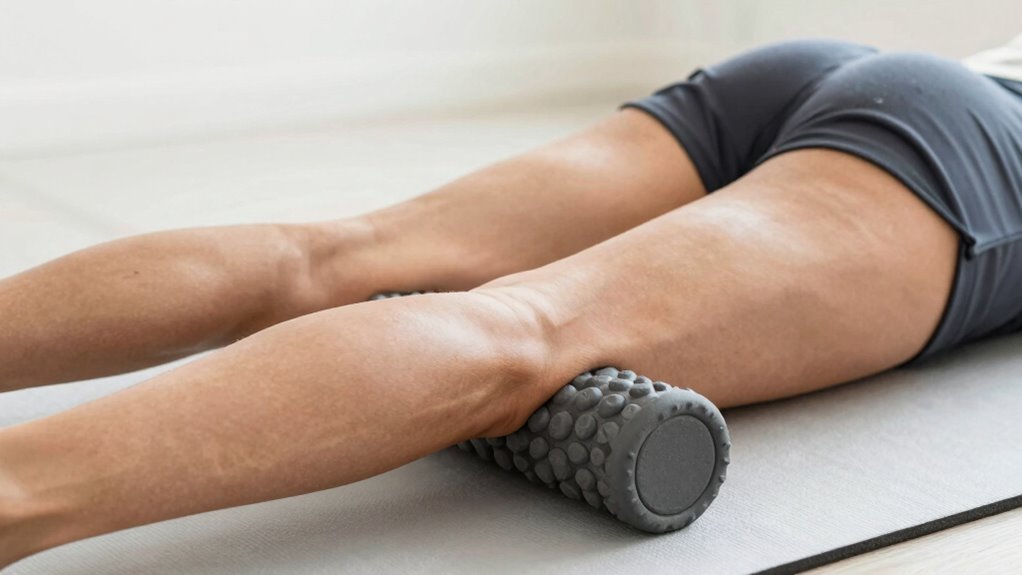
Why Using the Correct Foam Rolling Angle Eases Quad Pain
Using the correct foam rolling angle is essential for effectively easing quad pain. When you position the foam roller at the right angle, you target the muscle fibers more accurately, maximizing the benefits of foam density for your needs. A proper angle allows you to apply pressure where your muscle is tightest, helping to release knots and improve muscle flexibility. If you roll at an incorrect angle, you might not reach the deeper tissue layers or risk unnecessary discomfort. Adjusting your angle ensures you’re not just applying pressure randomly but directing it precisely for pain relief and increased mobility. Additionally, understanding how muscle anatomy influences your foam rolling technique can help you better appreciate the importance of precise techniques in recovery and fitness. Recognizing the role of muscle fibers in your technique can further optimize your foam rolling sessions. Paying attention to the fascia structure surrounding your muscles can enhance your understanding of how foam rolling affects connective tissues. Moreover, being aware of tissue depth can guide you in adjusting your pressure and angle to target different layers effectively. Remember, the right foam rolling angle enhances your technique, making each session more effective and comfortable.
Adjustable Shadowfit Foam Roller Equipment for Sore Muscle, Tissues ∣ Massage Rollers for Maximum Tension Relief ∣ High Density Foam for Deep Tissue Pain Relief, Thigh, Arms (Red)
Innovative Design: This foam roller can collapse from a 13.8 inch muscle roller to as small as 5.2…
As an affiliate, we earn on qualifying purchases.
As an affiliate, we earn on qualifying purchases.
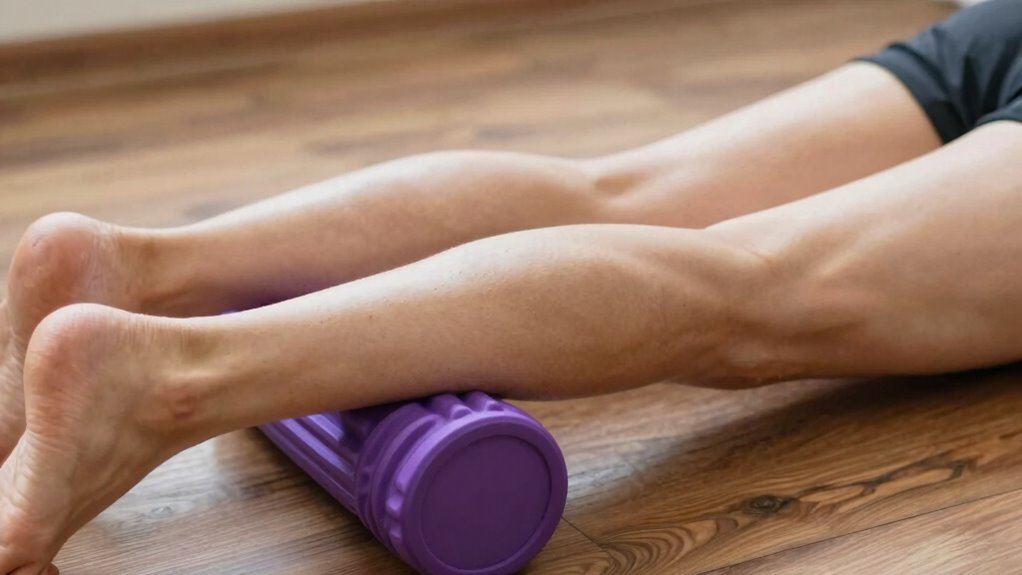
How to Find the Best Foam Rolling Position for Your Quads
To find the best foam rolling position for your quads, start by ensuring your body is properly aligned to target the area effectively. Pay attention to tender spots that may need extra focus, and don’t hesitate to adjust your foam angle to increase pressure. Experimenting with these points helps you customize your foam rolling for maximum relief. Additionally, focusing on recovery techniques, such as controlled breathing and HRV monitoring, can optimize your overall recovery process. Incorporating proper foam roller setup can also improve your technique and reduce the risk of injury. Using luxury recovery tools can further enhance your post-workout regimen and comfort. For example, understanding the importance of essential oils for muscle relaxation can help you choose soothing scents to complement your recovery routine. Being mindful of muscle fascia release techniques can provide deeper relief and improve flexibility.
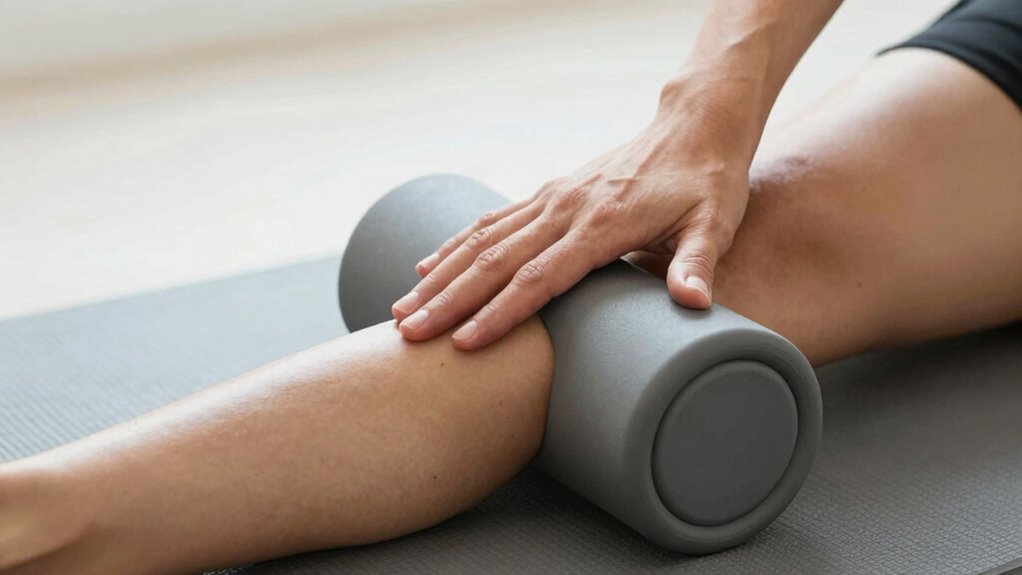
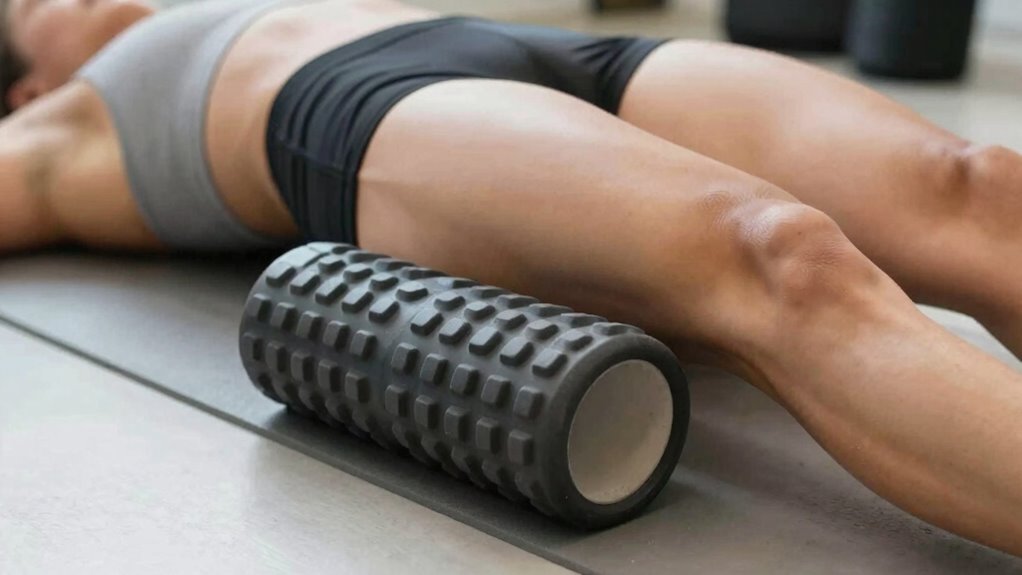
Proper Body Positioning
Finding the most comfortable and effective foam rolling position for your quads requires some trial and error, as everyone’s body is different. To promote muscle relaxation and posture correction, adjust your position until you feel a gentle pressure without sharp sensations. Keep your core engaged and your hips aligned with your shoulders. Use the table below to identify different body positions and their benefits:
| Position | Body Alignment | Focus Area |
|---|---|---|
| Lying face down, roll perpendicular | Spine neutral, hips down | Entire quad |
| Slightly rolled to side | Slight hip tilt | Outer quads |
| Kneeling, with support | Upright, relaxed torso | Upper quads |
| Prone, with leg bent | Flexed knee, relaxed hip | Lower quads |
| Supported on forearms | Shoulders relaxed | Overall muscle |
Adjust based on comfort, ensuring muscle relaxation and proper posture correction. Proper body positioning not only enhances foam rolling effectiveness but also minimizes the risk of strain or injury. Additionally, understanding Free Floating techniques can improve your overall foam rolling routine by allowing more natural movement and less strain. Incorporating body awareness into your routine can further optimize muscle release and posture benefits, enabling you to identify and adjust to muscle tension more effectively.
Identifying Tender Spots
Identifying tender spots on your quads is essential for targeting tight or sore areas effectively. Pay attention to areas with increased tendon sensitivity, which may feel sharper or more delicate when pressed. These spots often indicate muscle tightness or strain that needs specific attention. As you foam roll, gently probe your quads to locate these sensitive areas, noting any sharp or persistent discomfort. Tender spots may vary from person to person, so take your time to find the exact locations that feel more painful or rigid. Focusing on these areas ensures you’re addressing the root of your discomfort and maximizing foam rolling benefits. Remember, tender spots are clues guiding you to where your muscles need the most release. For optimal results, understanding how muscle tightness develops can help you prevent future soreness and improve recovery. Being aware of muscle tightness development can also aid in designing preventive strategies to reduce soreness before it starts. Recognizing these signs early allows you to adjust your foam rolling technique for better muscle recovery and overall flexibility.
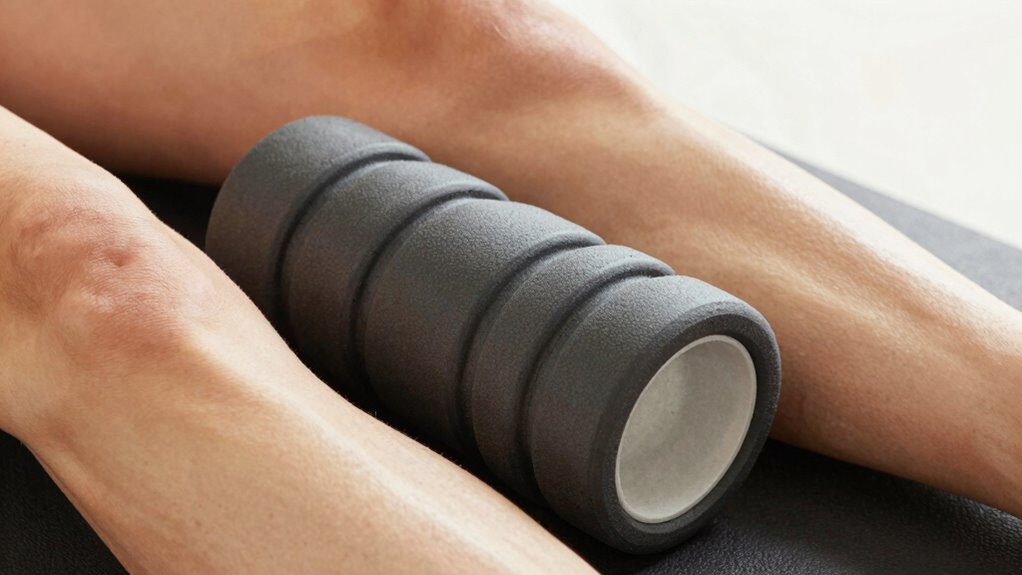
Adjusting Foam Angle
Adjusting the foam angle is essential for targeting your quads effectively and avoiding unnecessary discomfort. By changing the angle, you can better address muscle tension and find a position that feels right without overstressing your joints. If you experience sharp sensations, slightly shift the foam to reduce pressure on sensitive areas. Experiment with different angles—more perpendicular or oblique—to optimize pressure distribution. This helps improve joint flexibility and ensures you’re not aggravating tight muscles or causing strain. Paying attention to body response and making slight adjustments can make a significant difference in comfort and effectiveness. Incorporating feedback from your muscle sensations can guide you toward more effective foam rolling positions. Remember, the goal is to relieve tension without pain, so take your time finding the most comfortable and beneficial foam rolling position. Adjusting the foam angle also allows for better pressure modulation, ensuring you target the muscles precisely. Incorporating proper sauna safety tips can also enhance your recovery and relaxation process. Additionally, being mindful of proper technique can prevent injury and maximize benefits during your foam rolling sessions.
TriggerPoint Grid 1.0 Foam Roller – 13" Multi-Density Massage Roller for Deep Tissue & Muscle Recovery – Relieves Tight, Sore Muscles & Kinks, Improves Mobility & Circulation – Targets Key Body Parts
IMPROVE MUSCLE RECOVERY – Multi-density GRID features a three-dimensional surface that provides more efficient muscle recovery by promoting…
As an affiliate, we earn on qualifying purchases.
As an affiliate, we earn on qualifying purchases.
Common Mistakes That Make Foam Rolling Uncomfortable
One common mistake that makes foam rolling uncomfortable is applying too much pressure too quickly. Many people fall for common misconceptions that more pressure equals better results, but this can cause unnecessary pain and tissue damage. Foam rolling myths suggest that intense discomfort means you’re working effectively, but in reality, pain often signals you’re doing harm. Instead, focus on gentle, controlled pressure and listen to your body. Rushing through the process or pressing too hard can lead to soreness, frustration, and even injury. Remember, foam rolling should feel like a deep massage—not unbearable pain. Proper technique involves patience and moderation, allowing your muscles to relax gradually. Additionally, understanding muscle tissue response can help you incorporate foam rolling into a comprehensive wellness routine. Recognizing how your muscle tissue responds can prevent overdoing it and promote recovery. Being aware of AI-driven discoveries in healthcare further emphasizes the importance of safe, evidence-based practices. Avoid these mistakes, and you’ll make foam rolling a more comfortable and effective part of your routine.
TriggerPoint Grid 1.0 Foam Roller – 13" Multi-Density Massage Roller for Deep Tissue & Muscle Recovery – Relieves Tight, Sore Muscles & Kinks, Improves Mobility & Circulation – Targets Key Body Parts
IMPROVE MUSCLE RECOVERY – Multi-density GRID features a three-dimensional surface that provides more efficient muscle recovery by promoting…
As an affiliate, we earn on qualifying purchases.
As an affiliate, we earn on qualifying purchases.
How to Adjust Your Foam Rolling Angle for Better Relief
To get the most relief from foam rolling your quads, it’s important to experiment with your rolling angle. Adjusting the angle can target different muscle fibers and reduce sharp sensations. If you feel discomfort, try tilting the foam roller slightly to hit a different spot or angle, which can soften the pressure. Consider your foam density; a denser foam provides more intense pressure, so a lighter angle may be more comfortable. Also, control your rolling speed—slower rolls allow deeper relaxation, while faster movements can increase discomfort. Pay attention to how your body responds and make small adjustments to find the *ideal* angle that alleviates pain without causing additional discomfort. Consistent, mindful adjustments can *considerably* improve your foam rolling experience.
Signs You’re Using the Right Foam Rolling Technique
You’ll know you’re using the right foam rolling technique when you start to feel relief rather than sharp pain or discomfort. Proper foam technique involves gentle pressure and controlled movements, ensuring you’re not overdoing it. Pay attention to how your body responds on the foam surface—if the sensation becomes more tolerable, you’re on the right track. Look for these signs:
Use gentle pressure and controlled movements to find relief without sharp pain.
- Reduced muscle tightness and soreness
- A comfortable, steady pressure without pinching or stabbing
- Consistent, smooth movements on the foam surface
If you notice sharp pain or increased discomfort, adjust your technique by lightening pressure or changing your angle. Using the correct foam surface and technique helps target muscles effectively while avoiding injury or irritation.
Different Foam Rolling Methods for Various Quad Issues
To effectively address different quad issues, you need to focus on targeted rolling positions that hit specific problem areas. Adjust your pressure levels and timing to match your comfort and needs, ensuring you don’t overdo it. Fine-tuning these methods helps you get the most benefit from foam rolling for your quads.
Targeted Rolling Positions
Different quad issues require specific foam rolling positions to effectively target tightness and trigger points. By adjusting your position, you can optimize fascia release and reduce muscle tension.
Try these targeted approaches:
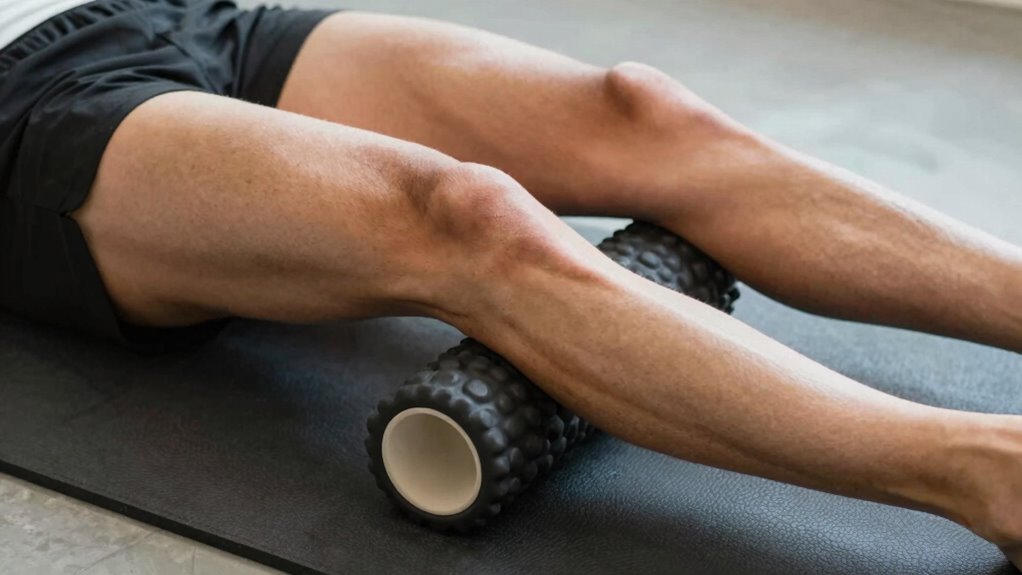
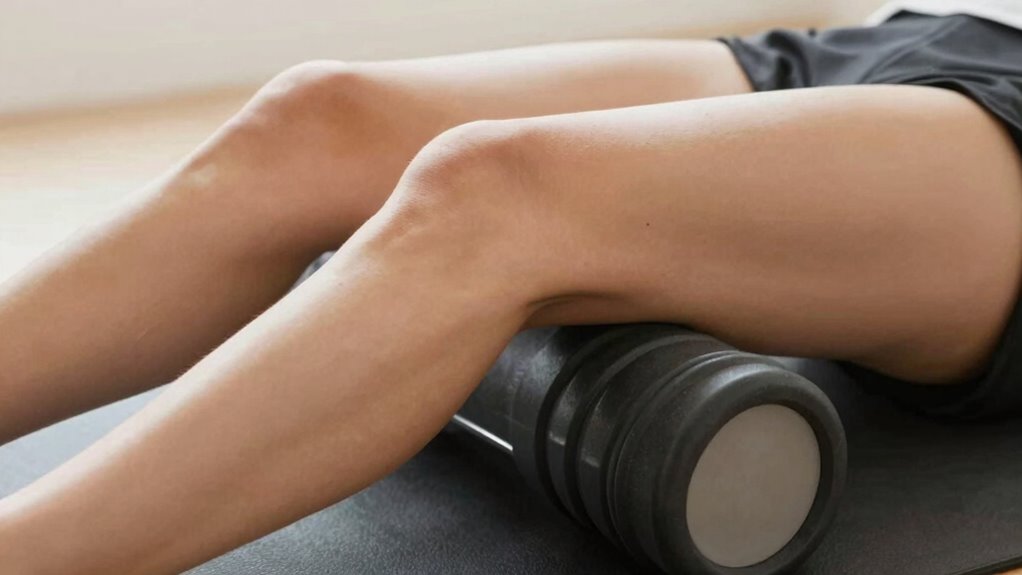
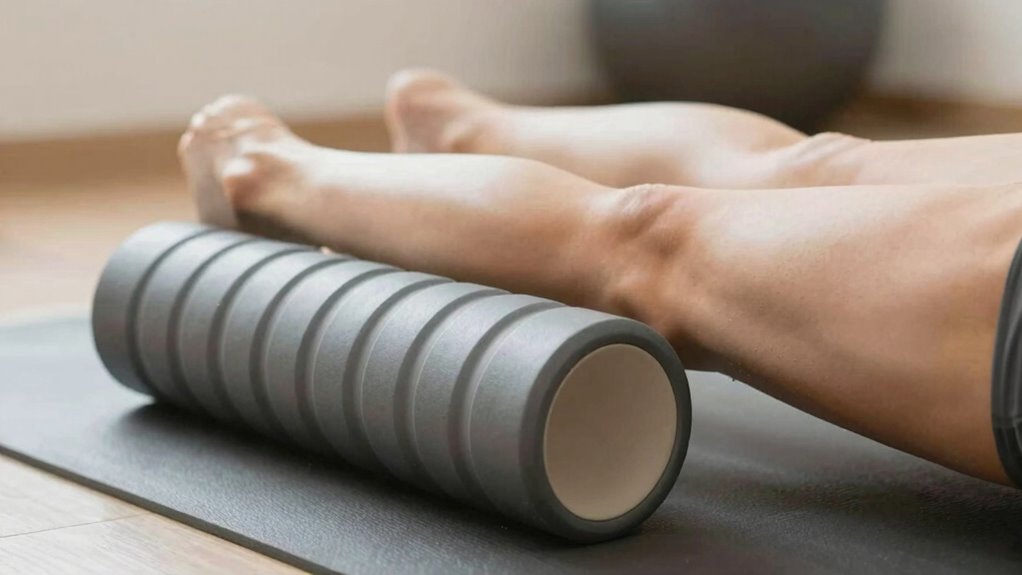
- Supine foam rolling: Lie face-up with a foam roller under your quads, applying gentle pressure to focus on muscle tightness.
- Side-lying position: Roll along the outer quad by lying on your side, targeting fascia release in the lateral muscles.
- Kneeling position: Place the foam roller under your thigh while kneeling, which helps reach deeper trigger points and relieves localized muscle tension.
Each position allows you to focus on different parts of the quad, ensuring specific issues are addressed effectively. Proper placement enhances fascia release and minimizes sharp sensations during foam rolling.
Adjusting Pressure Levels
Adjusting the pressure you apply during foam rolling is key to effectively addressing various quad issues. Start with gentle pressure and gradually increase as your muscles relax. Pressure adjustments depend on your comfort level and the specific problem area. If you experience sharp sensations, lighten your touch to avoid aggravating the injury. Using the correct foam angle can also help control the pressure, allowing you to target tight spots without excessive force. For sensitive areas, lean lightly into the foam roller and adjust your body position to reduce pressure. Conversely, if you need deeper relief, apply more body weight or shift your body to increase pressure. Remember, controlled pressure helps release muscle tension without causing discomfort or damage.
Timing and Duration
Choosing the right timing and duration for foam rolling your quads is essential for effective relief and maximizing foam rolling benefits. Generally, spend about 1-2 minutes on each quad, focusing on tight or sore spots. If you’re targeting muscle recovery, shorter, more frequent sessions can help reduce soreness and improve flexibility. For acute pain, limit rolling to 30 seconds per spot to prevent overstimulation. Consider rolling before workouts to warm up muscles or after for recovery. Remember, consistency matters—regular sessions enhance long-term benefits.
- Roll for 1-2 minutes per session for ideal muscle recovery
- Focus on tender spots with 30-60 second holds
- Use shorter sessions if experiencing sharp pain or sensitivity
Tips to Keep Foam Rolling Comfortable and Effective
To keep foam rolling your quads comfortable and effective, start by paying attention to your body’s signals. Choose a foam roller with a suitable foam texture—softer foam is gentler, while firmer surfaces provide deeper pressure. Adjust the surface firmness based on your sensitivity and experience level. If you feel sharp pain, reduce pressure or switch to a softer roller. Focus on maintaining proper form and avoid rolling over bony areas or joints. Keep your movements controlled and consistent, targeting tight spots without overstretching. Remember, the goal is to release tension gradually, not to cause discomfort. Regularly check in with your body, and don’t hesitate to modify your technique or equipment to guarantee foam rolling remains both comfortable and effective.
Frequently Asked Questions
Can Foam Rolling Help Prevent Quad Injuries?
Yes, foam rolling can help prevent quad injuries by improving muscle flexibility and reducing tightness. When you regularly roll your quads, you release muscle knots and enhance blood flow, which keeps the tissue healthy and responsive. This proactive approach helps you move more freely, decreases the risk of strains or tears, and promotes injury prevention. Keep foam rolling as part of your routine to stay limber and avoid unnecessary setbacks.
How Often Should I Foam Roll My Quads?
You should foam roll your quads 3 to 4 times a week to promote muscle relaxation and help prevent injuries. This frequency allows your muscles to recover and release tension without overdoing it. Consistent foam rolling keeps your muscles flexible, reduces soreness, and supports injury prevention. Remember to listen to your body—if you feel pain, ease up and adjust your routine accordingly for the best results.
Is There a Recommended Duration for Each Foam Rolling Session?
Think of foam rolling as a gentle dance with your muscles—about 1 to 2 minutes per area. Keep each session focused on muscle relaxation without overdoing it, which helps prevent injuries. When you stick to this duration, you’ll find relief and improved flexibility, reducing the risk of strain. Remember, consistency and listening to your body are key to effective foam rolling and injury prevention.
Can Foam Rolling Cause Any Long-Term Damage?
Foam rolling, when done correctly, generally doesn’t cause long-term damage. It promotes muscle relaxation and offers circulatory benefits, helping your muscles recover and reduce soreness. However, overdoing it or applying excessive pressure can lead to bruising or nerve irritation. Always listen to your body, avoid rolling over joints or bones, and stick to recommended durations. If you notice persistent pain, consult a healthcare professional to guarantee safe practice.
Should I Foam Roll Before or After Workouts for Best Results?
You should foam roll after your workout for best results, as it helps with post-work recovery by releasing muscle tension. Incorporate foam rolling into your pre-work warm-up if you want to improve flexibility and reduce injury risk, but prioritize it post-exercise to soothe tight muscles. This approach guarantees you maximize benefits, whether preparing your muscles or aiding recovery, and prevents sharp sensations during activity.
Conclusion
Think of foam rolling your quads like tuning a delicate instrument. Find the right angle, and suddenly, the sharp dissonance turns into a soothing melody. When you adjust your position, you’re fine-tuning your relief, ensuring each note of discomfort fades. Keep practicing, and you’ll craft a harmonious balance between effort and comfort. With patience and the right technique, your quads will resonate with ease, turning pain into a symphony of recovery.