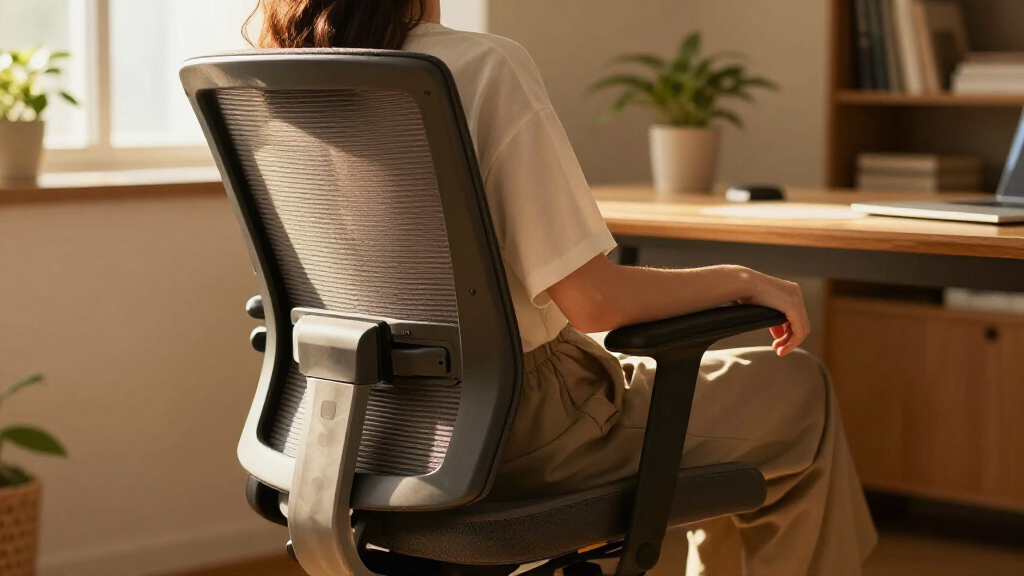

This guide shows you how to set up an ergonomic office chair so it actually fits your body. Most people own an adjustable chair but never adjust it beyond seat height — and then wonder why their back, neck, or shoulders ache by mid-afternoon. Every adjustment exists for a reason, and setting them in the right order takes less than half an hour.

Get comfort and recovery gear delivered free — and shop member deals
- Fast, free delivery on millions of items
- Access to Prime Big Deal Days deals on October 6–7
- Prime Video, Amazon Music and more included

Eurotech Ergohuman GEN2 High-Back Mesh Office Chair, Blue
- ✔ Brand: Ergohuman
- ✔ Model: ME7ERG-BLUE(N)
- ✔ Material: Mesh
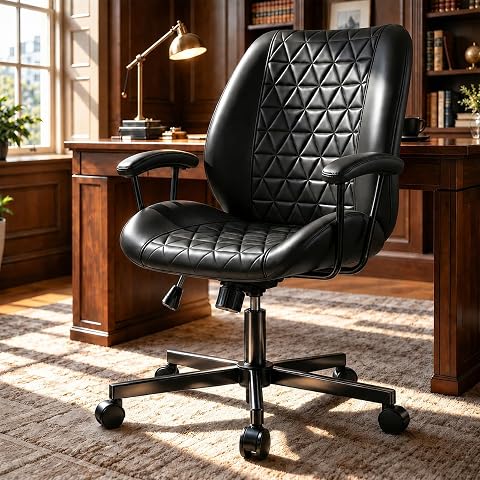
CozySpot PU Leather Office Chair with Lumbar Support and Removable Arms
- ✔ Brand: CozySpot
- ✔ Model: CS-BG01
- ✔ Upholstery: PU leather

Mid-Century Modern Office Chair with Armrests and Adjustable Backrest, Green
- ✔ Brand: BERYTH
- ✔ Model: BHZ-024105
- ✔ Color: Green
By the end of this guide, you will have a chair configured so your feet rest flat on the floor, your lower back is supported, your forearms rest level with your desk, and the chair carries your weight instead of your muscles doing the work. This guide is written for beginners: no special skills are required, and you only need your chair, your desk, and a few minutes of patience. Expect the full process to take 20-30 minutes, including a short test sit.
Difficulty: Beginner | Time: 20-30 minutes
What You’ll Need
Tools & Materials:
- An ergonomic office chair with adjustable seat height, and ideally adjustable armrests, lumbar support, seat depth, and recline
- A desk at its normal working height
- Your normal work footwear (shoes affect seat height)
- A mirror, a phone camera, or a second person to check your posture from the side (optional but helpful)
- The chair’s instruction manual or manufacturer’s adjustment guide, if available
Knowledge:
- Basic familiarity with the adjustment levers and knobs on your chair (usually covered in the manual)
- Awareness of any existing back, neck, or wrist pain so you can notice whether the setup relieves it
Before starting, sit in the chair and locate every control: the seat height lever (usually under the right side of the seat), the seat depth slider or knob, the lumbar knob or movable pad, the armrest buttons, and the recline tension knob under the seat. If you do not have the manual, search the manufacturer’s website using the model name, which is often printed on a label under the seat pan. Chairs vary: if yours lacks a feature mentioned in a step, skip that step and move on. Do not force any lever or knob — most controls either pull, push, or turn, and forcing one that resists can break the mechanism.
Eurotech Ergohuman GEN2 High-Back Mesh Office Chair, Blue
The Ergohuman GEN2 is the most complete ergonomic package in this lineup, and it isn’t particularly close. Where the CozySpot offers height and tilt adjustments and the BERYTH stops at two, this chair gives you seat depth, back height, back angle, arm height, headrest position, tilt tension, and tilt lock — eight distinct points of adjustment that let you tune the chair to your body rather than adapting your posture to the chair. That distinction is what real ergonomics is about, and it’s why this model sits at the top of our ranking.The flexible mesh lumbar support is the standout feature. Unlike the fixed contoured lumbar panels on the CozySpot and BERYTH, the Ergohuman’s lumbar system moves with your spine as you shift positions, which matters greatly during long work sessions. The full-mesh construction also runs noticeably cooler than the PU leather on the other two chairs — a genuine advantage if you sit for six or more hours a day. The high-back design with headrest supports the neck and upper back, which neither mid-back competitor addresses.Tradeoffs exist, however. At 55 pounds, this is by far the heaviest chair here — twice the weight of the BERYTH — so moving it between rooms is a chore. Assembly is more involved than the CozySpot’s 15–20 minute process, and the 275-pound weight capacity is actually lower than the budget CozySpot’s 350-pound rating, which larger users should note. The limited lifetime warranty, however, outclasses everything else in this comparison.
Pros:
- Eight points of adjustment including seat depth and tilt lock
- Flexible mesh lumbar support that moves with your spine
- Breathable mesh keeps you cool during long sessions
- Limited lifetime warranty backs the build long-term
Cons:
- Heaviest chair in this lineup at 55 pounds
- More involved assembly than simpler task chairs
- 275 lb weight capacity is lower than the CozySpot’s 350 lb
Best for: Remote workers and professionals who sit 6+ hours daily and need a fully adjustable, breathable chair
Not ideal for: Buyers on a tight budget, users over 275 pounds, or anyone wanting a lightweight, easy-to-move chair
Bottom line: The most adjustable and breathable chair in this comparison, and the one we’d trust for full workdays.
“The most adjustable and breathable chair in this comparison, and the one we’d trust for full workdays.”
CozySpot PU Leather Office Chair with Lumbar Support and Removable Arms
The CozySpot occupies the pragmatic middle ground in this lineup: far more capable than a bare-bones task chair, far cheaper than the Ergohuman, and more functional than the style-first BERYTH. Its most distinctive feature is one neither competitor offers — detachable armrests. If you work at a narrow desk, slide under a keyboard tray, or simply prefer an open seat, removing the padded arms takes minutes and transforms the chair’s footprint.Where this model genuinely outperforms the Ergohuman is in weight support: its 350-pound capacity beats the flagship’s 275-pound rating, making it the safer choice for larger users who don’t want to pay premium prices for fit. The 90°–120° tilt range with adjustable tension covers the practical essentials of reclining, and the wipe-clean PU leather is more forgiving with spills than the Ergohuman’s mesh — a real consideration for households with kids or coffee habits.The compromises are in refinement rather than function. The lumbar support is contoured but fixed, so it can’t be repositioned to match your spine the way the Ergohuman’s flexible system can. There’s no headrest and no seat depth adjustment, both of which matter during marathon sessions. Compared to the BERYTH, though, the CozySpot offers more adjustment range, a higher weight capacity, and easier maintenance — which is why it outranks the mid-century option despite a plainer look. Assembly is refreshingly quick at 15–20 minutes, and the five-year after-sales support adds peace of mind that budget chairs rarely provide.
Pros:
- 350 lb weight capacity — highest in this lineup
- Detachable padded armrests for flexible desk setups
- Wipe-clean PU leather handles spills easily
- Quick 15–20 minute assembly with 5-year support
Cons:
- Fixed lumbar support can’t be repositioned
- No headrest or seat depth adjustment
- PU leather traps heat during long sessions
Best for: Students, home-office workers, and larger users (up to 350 lb) who want core ergonomic features without a premium price
Not ideal for: All-day sitters who need adjustable lumbar positioning, seat depth tuning, or head and neck support
Bottom line: The smart budget pick — it covers the ergonomic essentials and out-supports the flagship on weight capacity.
“The smart budget pick — it covers the ergonomic essentials and out-supports the flagship on weight capacity.”
Mid-Century Modern Office Chair with Armrests and Adjustable Backrest, Green
The BERYTH mid-century chair is the honest answer to a question the other two chairs ignore: what if your office chair has to look good in your living space? With its curved walnut frame and green PU leather seat, this is the only option here we’d happily place in a visible study nook or reading corner. Neither the utilitarian Ergohuman nor the plain CozySpot competes on aesthetics, and for many buyers that decides the purchase.Ergonomically, it’s the lightest-equipped chair of the three — just height adjustment and an adjustable backrest. That backrest angle adjustment does give it a real edge over static decorative chairs, and the contoured foam seat with built-in armrests is comfortable for shorter stints. Compared to the CozySpot, you give up tilt tension control and 50 pounds of weight capacity (300 versus 350); compared to the Ergohuman, you give up nearly everything else. But at 27.8 pounds, it’s the easiest chair here to scoot between rooms, and the 360° swivel with casters keeps it functional despite the vintage silhouette.The right way to judge this chair is by its intended workload. For a study room, reading space, or a home office used a few hours a day, it delivers comfort and character without dominating the room. For a full-time remote worker, the lack of lumbar adjustability and seat depth tuning would become noticeable within a week — that buyer should step up to the Ergohuman instead. Consider it a lifestyle chair with genuine, if modest, ergonomic credentials.
Pros:
- Walnut frame and green upholstery blend into living spaces
- Adjustable backrest sets it apart from static decorative chairs
- Lightest chair in the lineup at 27.8 lb — easy to reposition
- Contoured foam seat with armrests for comfortable short sessions
Cons:
- Only two adjustments — seat height and backrest angle
- No lumbar support tuning or tilt tension control
- 300 lb weight capacity trails the CozySpot’s 350 lb
Best for: Design-conscious buyers furnishing a study, reading corner, or visible home office used a few hours daily
Not ideal for: Full-time desk workers who need lumbar adjustability, tilt lock, or all-day support
Bottom line: A stylish hybrid that trades deep adjustability for looks — ideal for light use, outclassed for long workdays.
“A stylish hybrid that trades deep adjustability for looks — ideal for light use, outclassed for long workdays.”
As an Amazon Associate we earn from qualifying purchases.
Before You Start
Adjust your chair before your workstation, not after. Chair height determines whether your elbows sit level with the desk, so set the chair first, then adjust the desk, monitor, or keyboard to match. If your desk is fixed-height and too tall after you set the chair correctly, plan to add a footrest rather than raising the chair to reach the desk — raising the chair to compensate for a tall desk is the single most common setup error.
Also wear the shoes you normally work in. Sneakers, dress shoes, and bare feet change your seated height by a centimeter or more, which affects the seat height you need.
Step-by-Step Instructions
Step 1: Set the seat height so your feet rest flat and knees bend at 90 degrees
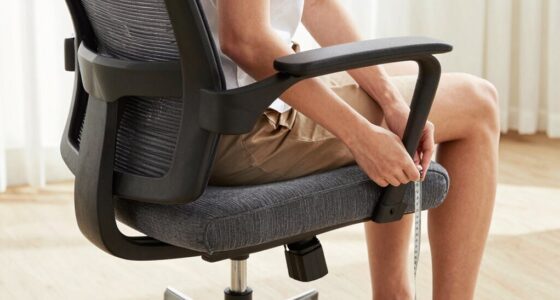
Sit in the chair with your back against the backrest and pull the height lever to raise or lower the seat. Raise or lower the seat until your feet rest flat on the floor, your knees bend at roughly 90 to 110 degrees, and your thighs are parallel to the floor or angled slightly downward. Slide two or three fingers between the front edge of the seat and the back of your knee to check the gap behind your knees. Lower the seat if your feet dangle; raise it if your knees sit higher than your hips.
Tip:If you have to raise the chair to reach a tall desk and your feet dangle, do not compromise — keep the chair at the correct height for your legs and add a footrest to support your feet.
Check: Feet flat on the floor (or footrest), thighs roughly horizontal, two to three fingers of clearance behind each knee, and no pressure on the underside of your thighs.
Step 2: Adjust the seat depth so your back touches the backrest
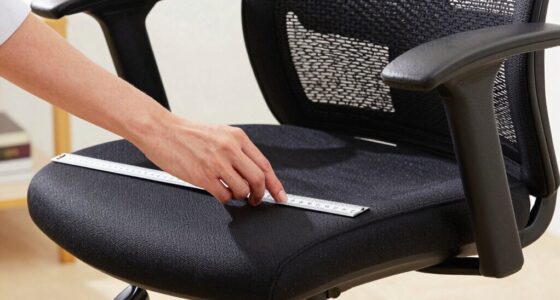
Sit all the way back in the chair so your lower back contacts the backrest. Slide the seat pan forward or backward using the depth slider, usually a lever under the front of the seat or a knob on the side. Measure the distance between the seat’s front edge and the backs of your knees by sliding two or three fingers into the gap. Shorten the seat depth if the edge presses into the backs of your knees or cuts circulation; lengthen it if you lose thigh support and feel pressure on your sit bones.
Tip:On chairs without a seat depth adjustment, compensate by placing a firm cushion or lumbar pillow behind your lower back to bring your spine forward to the backrest.
Check: Your lower back rests fully against the backrest while two to three fingers fit between the seat edge and the backs of your knees.
Step 3: Position the lumbar support at your lower back curve
Raise or lower the lumbar adjustment — either a knob that inflates a pad, a lever that moves it up and down, or a pad you physically reposition — until the pad sits in the natural inward curve of your lower back, roughly at belt level. Turn the firmness or depth control until you feel the pad gently filling the curve without pushing you forward off the seat. Sit for a minute and notice the pressure: loosen the pad if it feels like a fist, and firm it up if you feel no contact at all.
Tip:The most common lumbar error is positioning the pad too high, which pushes your mid-back and pitches your head forward. Keep it at or just above belt height.
Check: You feel even contact along your lower back when relaxing into the chair, and your natural spinal curve is maintained without effort.
Step 4: Adjust the armrests so your forearms rest level with the desk
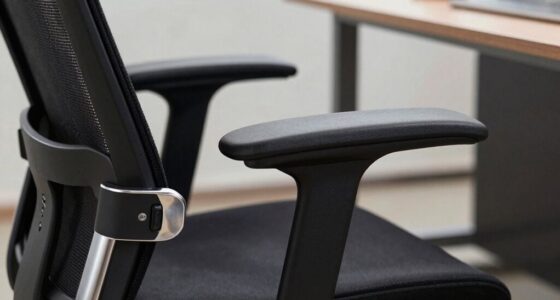
Relax your shoulders completely and bend your elbows near 90 degrees. Raise or lower the armrests until your forearms rest lightly on them with your shoulders neither lifted nor drooping. Move the armrest width and pivot until they sit directly under your forearms, not out to the sides. Glide your forearms over the desk surface and confirm your shoulders do not rise. Lower the armrests or swing them out of the way if they collide with the desk or prevent you from pulling close to your work surface.
Tip:Armrests are for breaks between typing, not constant leaning. While typing or using the mouse, hover your hands over the keyboard and let the armrests catch your arms when you pause.
Check: Shoulders relaxed and level, elbows bent at roughly 90 degrees, forearms supported without shrugging, and the chair pulls close enough to the desk that you are not reaching forward.
Step 5: Set the recline tension and backrest angle
Turn the recline tension knob under the seat until leaning back requires moderate effort and the chair returns you upright smoothly — you should neither fall backward nor have to push hard to recline. Tighten the knob if you fall backward easily; loosen it if reclining takes effort. Lock the backrest angle using the recline lock, if your chair has one, at a slight recline of 100 to 110 degrees (10 to 20 degrees back from upright), which reduces pressure on your spine compared to sitting bolt-straight. Keep it locked there for focused work, and unlock it for reading or phone calls so you can shift positions.
Tip:Movement is part of good ergonomics. A locked upright position all day is not the goal — alternating between upright for typing and gentle recline for reading keeps muscles from fatiguing.
Check: You can lean back with controlled, moderate resistance, and the chair supports you at a slight recline without pushing you forward or tipping you back.
Step 6: Adjust your workstation to match the chair
Keep the chair settings you just made and adjust everything else to match them. Raise or lower your monitor so the top of the screen sits at or slightly below eye level and about an arm’s length away. Position your keyboard and mouse so your elbows stay near your sides at roughly 90 degrees while typing, with wrists straight. Add a footrest and raise your chair slightly if your desk is too high; install desk risers rather than lowering the chair if it is too low.
Check: You can type and view the screen without leaning forward, craning your neck, shrugging your shoulders, or lifting your feet off the floor or footrest.
Step 7: Test the setup with a 30-minute sit and fine-tune
Work at your desk for 30 minutes with the new settings, then stop and scan your body: check whether your shoulders are tense, your lower back is aching, your legs are tingling, or your feet are restless. Make one small adjustment at a time based on what you notice — a centimeter of seat height or a slightly softer lumbar setting — and test again. Repeat small tweaks over two or three sessions instead of one long adjustment marathon.
Check: After 30 minutes you feel no pressure points, no numbness, and no urge to constantly shift — just a neutral, supported posture you could hold for an hour without strain.
Common Mistakes to Avoid
- Raising the chair to reach a desk that is too high, leaving feet dangling — Set seat height for your legs first, then use a footrest if the desk is too tall. Dangling feet compress the thighs and cause numbness and lower-back strain within an hour.
- Placing the lumbar support too high on the back — Keep the lumbar pad at or just above belt height, in the natural inward curve of the lower spine. A pad at mid-back pushes the torso forward and drops the head into a forward-hunch position.
- Setting armrests too high, causing chronic shoulder shrugging — Relax your shoulders completely before setting armrest height. If your shoulders rise at all when resting on the armrests, lower them until your shoulders hang naturally.
- Sitting bolt upright at 90 degrees all day — Lock the backrest at a 100-110 degree recline for desk work. Research on spinal disc pressure shows a slight recline with lumbar support loads the spine less than a rigid upright posture.
Troubleshooting
Problem: Lower back still aches after a full day despite lumbar support
Solution: Check seat depth first — if you cannot sit fully back against the backrest, the lumbar pad never reaches your spine. Add a cushion or adjust the slider. Also confirm you are actually leaning back into the chair rather than perching on the front edge, which is a habit as much as a setup issue.
Problem: Legs or feet go numb during long sessions
Solution: This is almost always a seat height or depth problem. If the seat edge presses the backs of your knees, reduce seat depth or lower the seat slightly. If your feet dangle, add a footrest so your thighs are not compressed against the seat edge.
Problem: Shoulders and neck feel tight by early afternoon
Solution: Recheck armrest height and monitor position. Shrugging shoulders usually means armrests are too high; neck tension usually means the monitor is too low or too far, pulling your head forward. Correct the monitor height before changing anything on the chair.
Problem: Chair keeps sinking or reclining on its own
Solution: A chair that slowly sinks has a failed gas lift cylinder, and a chair that tips back has worn recline tension. These are mechanical failures, not adjustment errors. Replacement gas cylinders and tension mechanisms are inexpensive and available for most major chair brands, but if the chair is under warranty, contact the manufacturer first.
What Success Looks Like
Your chair is set up correctly when all of the following are true at once: your feet rest flat on the floor or a footrest with knees bent near 90 degrees; two to three fingers fit between the seat edge and the backs of your knees; your lower back contacts the lumbar support at belt height without pressure points; your shoulders hang relaxed with forearms resting level on the armrests; and you can type with straight wrists and view your monitor at eye level without leaning. The strongest test is time: after two hours of work you should feel no new aches, numbness, or the constant urge to shift position. A properly fitted chair fades into the background — you notice its absence, not its presence.
Next Steps
Recheck your setup every few months. Cushions compress, adjustment levers drift, and your own posture habits change — spend five minutes rerunning steps 1 through 5 quarterly. If you share the chair with someone else, write your settings on a card taped under the seat pan so you can restore them quickly. If pain persists after two weeks of correct setup, the problem may be your desk layout, monitor, or an underlying condition — consult an ergonomics specialist or a physical therapist rather than continuing to adjust the chair. If your chair simply lacks the adjustments described here (fixed armrests, no lumbar support, no seat depth), a low-cost lumbar cushion and footrest can recover most of the benefit before you consider replacing the chair.
Frequently Asked Questions
How long does it take to get used to a properly adjusted ergonomic chair?
Expect one to two weeks. If you have been sitting in a poorly adjusted chair for years, your muscles have adapted to bad posture, and correct posture can feel unfamiliar or even slightly tiring at first. If something still feels wrong after two full weeks of consistent use, revisit the adjustments one at a time.
Should the chair be adjusted to fit the desk, or the desk to fit the chair?
Always set the chair to fit your body first, then adapt the desk to the chair. If the desk is too high, raise the chair slightly and add a footrest; if it is too low, use desk risers. Adjusting the chair to a badly positioned desk locks your body into a poor posture all day.
Is a more expensive chair automatically better for my back?
No. A mid-priced chair adjusted correctly will outperform an expensive chair left at factory settings. What matters is the range of adjustments and whether you use them: seat height, depth, lumbar support, and armrest adjustability cover the essentials. Mesh versus padded seats is a comfort preference, not an ergonomic requirement.
How often should I change my sitting position during the day?
Shift positions or stand for a couple of minutes every 30 to 45 minutes. The best posture is a dynamic one — alternate between your upright typing position and the slight recline you set in step 5, and stand or walk briefly whenever you take a call or break. No static position, even a perfect one, is healthy for hours on end.
Do I need a footrest even if my desk height is correct?
Only if your feet cannot rest flat on the floor once the chair is at the correct height. This is common for shorter users at standard 73-76 cm desks. A footrest is not a failure of setup — it is the correct tool for keeping thighs supported and knees at the right angle when the chair and desk heights cannot both match your body.
Fall Picks
fall essentials
As an affiliate, we earn on qualifying purchases.